Have you checked out our fancy new Microform Reader yet?
We replaced the old, clunky Microform Reader of yesteryear in November 2016, and our shiny new ViewScan machine is already getting a lot of use. If you have an article you are after that happens to only exist in our microform collection, the instructions below should assist in getting it up and readable.
JCU Library has an extensive microform collection, consisting of both microfilm and microfiche and full of treasures that cannot be found elsewhere in the collection. A significant part of our collection of old newspapers exists only on microform, including the Townsville Daily Bulletin (the previous incarnation of what we now know as the Townsville Bulletin) which is available from as early as 1887. There are also a number of early journals stored on microform (eg, Journal of Chemical Research and Journal of Experimental Zoology), and other documents such as family records (eg, The Cameron Family Records), births, deaths, and marriages registry records (eg, Indexes of Births, Deaths, and Marriages (Victoria)), mining company records (eg, New Ravenswood Mines Records) and station records (eg, Records of Greenvale Station).
The new machine is located conveniently right beside the microform collection (just past Reference) where the old machine was and is far easier to use, so get in and give it a go. We've put together a set of general instructions which can be found beside the machine, as well as below. Happy micro-reading!
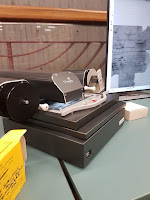 Loading Microfilm
- Push the glass tray back, so it is firmly in place.
- Following the diagram on the front of the reader, position the microfilm reel on the left hand wheel.
- Pull the glass tray towards you so the top glass plate is slightly ajar.
- Pass the microfilm reel under the guide and top glass plate, and slot the loose end into the right hand wheel as shown in the diagram on the machine.
- Make sure both ends are clipped firmly in place and lower the top glass by pushing the tray back.
- Align the tray so that the microfilm is under the camera and appears on your screen, and use the buttons on the front of the machine or at the bottom of the screen in the ViewScan software to navigate the film.
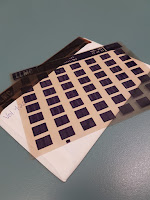 Loading Microfiche
- Pull the glass tray towards you so that the top glass plate is ajar, and lay the microfiche on the bottom tray.
- Pull the tray sideways and forwards or backwards to centre the first page of the microfiche under the light.
- Adjust the Camera Position in the ViewScan software, and then focus in or out using the software so that the whole page is viewed on the screen. These settings will be retained as you move from page to page and can be adjusted at any time.
- Manually move the tray sideways to move through the pages and navigate the fiche.
Using the ViewScan Software - Browse
- If the image on your screen is upside down or in mirror writing, don't despair! Simply use the Mirror Image or Flip Vertical tools on the right hand toolbar to correct the image.
- Rotation and Straighten tools are also available to align text and adjust the image.
- If the text or images are too dark this can be adjusted using the Image Settings tool in the right hand toolbar.
- There is also a Postitive/Negative tool to invert the colours of the image to allow for easier reading.
- The Digital Zoom + and - buttons operate as expected, allowing you to zoom in on a section of the screen. There is also a Magnify option under the Cropping tab that will allow you to zoom on certain sections.
- At any point while you are browsing your microfilm or microfiche, you can adjust the Camera Position using the Zoom In and Zoom Out icons on the toolbar. This allows you to use the camera's optical zoom for crisper focus.
- The Focus In and Focus Out options under Camera Focus in the toolbar allow you to adjust the focus of the image after zooming. When first loading the film or fiche, it can sometimes take a while to get the focus right, but these settings will be kept as you move from page to page.

Using the ViewScan Software - Cropping
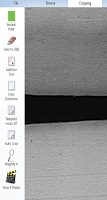
- Use the Cropping tab on the top of the screen to select sections of the text or images.
- Use the Capture option at the bottom of the screen to scan and save a temporary image of a whole page or cropped selection.
- More than one section can be selected on a page at once, using the Additional Cropping icon. By using the Additional Cropping icon it is possible to create a composite shaped image.
- Click on one or two captured images at the bottom of the screen to edit or annotate the images, or use the ClipMerge icon at the bottom of the screen.
Using the ViewScan Software - File
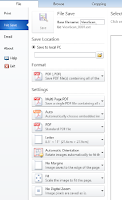
- The File tab contains all of your save options. Images you have created in the Cropping tab can be downloaded here.
- Select Save As to access options for saving in different formats, such as PDF, JPEG, or PNG.
- If you save as a PDF file, ViewScan provides the option of saving all of the images you have created into one, multi-page PDF document. This allows you to save an entire article into one easy to access file.
- Save your files to a USB so that you can access them later.
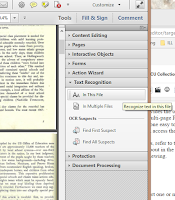
Making the text in your PDF searchable
- Open Adobe Acrobat Pro from the Desktop.
- Select Tools to open the right hand sidebar.
- Under Tools select Text recognition
- To convert one or more pages in the current file, select In This File, nominate the pages you wish to convert, and press OK


Comments